DXDY 테크닉 ) 2차원 배열에서 4방향 움직이기

코딩테스트에서 2차원 배열을 데이터로 주고 그 안에서 포인터를 이동시키는 문제 유형에서 유용하게 사용할 수 있는 방법입니다.

▪︎ dxdy 테크닉

dxdy 테크닉은 2차원 배열에서 어느 한지점의 포인터를 상하좌우로 간편하게 이동할 수 있는 방법입니다. x방향과 y방향의 direction 정보를 저장한 배열을 생성하고 순서대로 각 데이터를 참조하면서 현재 포인터 기준 4방향의 인덱스를 탐색할 수 있습니다.

image.png

1
2
3
4
5
6
7
8
9
10
11
12
13
14
15
16
17
18
19
20
21
const arr = [
[1, 2, 3],
[10, 20, 30],
[100, 200, 300],
];
const dx = [0, 0, -1, 1];
const dy = [-1, 1, 0, 0];

// 현재 위치를 (1,1) 이라고 할 때, pointer 위치의 값은 20
const cx = 1;
const cy = 1;

for (let i = 0; i < 4; i++) {
console.log(arr[cy + dy[i]][cx + dx[i]]);
}

// output :
// 2 (pointer 기준 '상')
// 200 (pointer 기준 '하')
// 10 (pointer 기준 '좌')
// 30 (pointer 기준 '우')

▪︎ Example of Apply

image.png

image.png

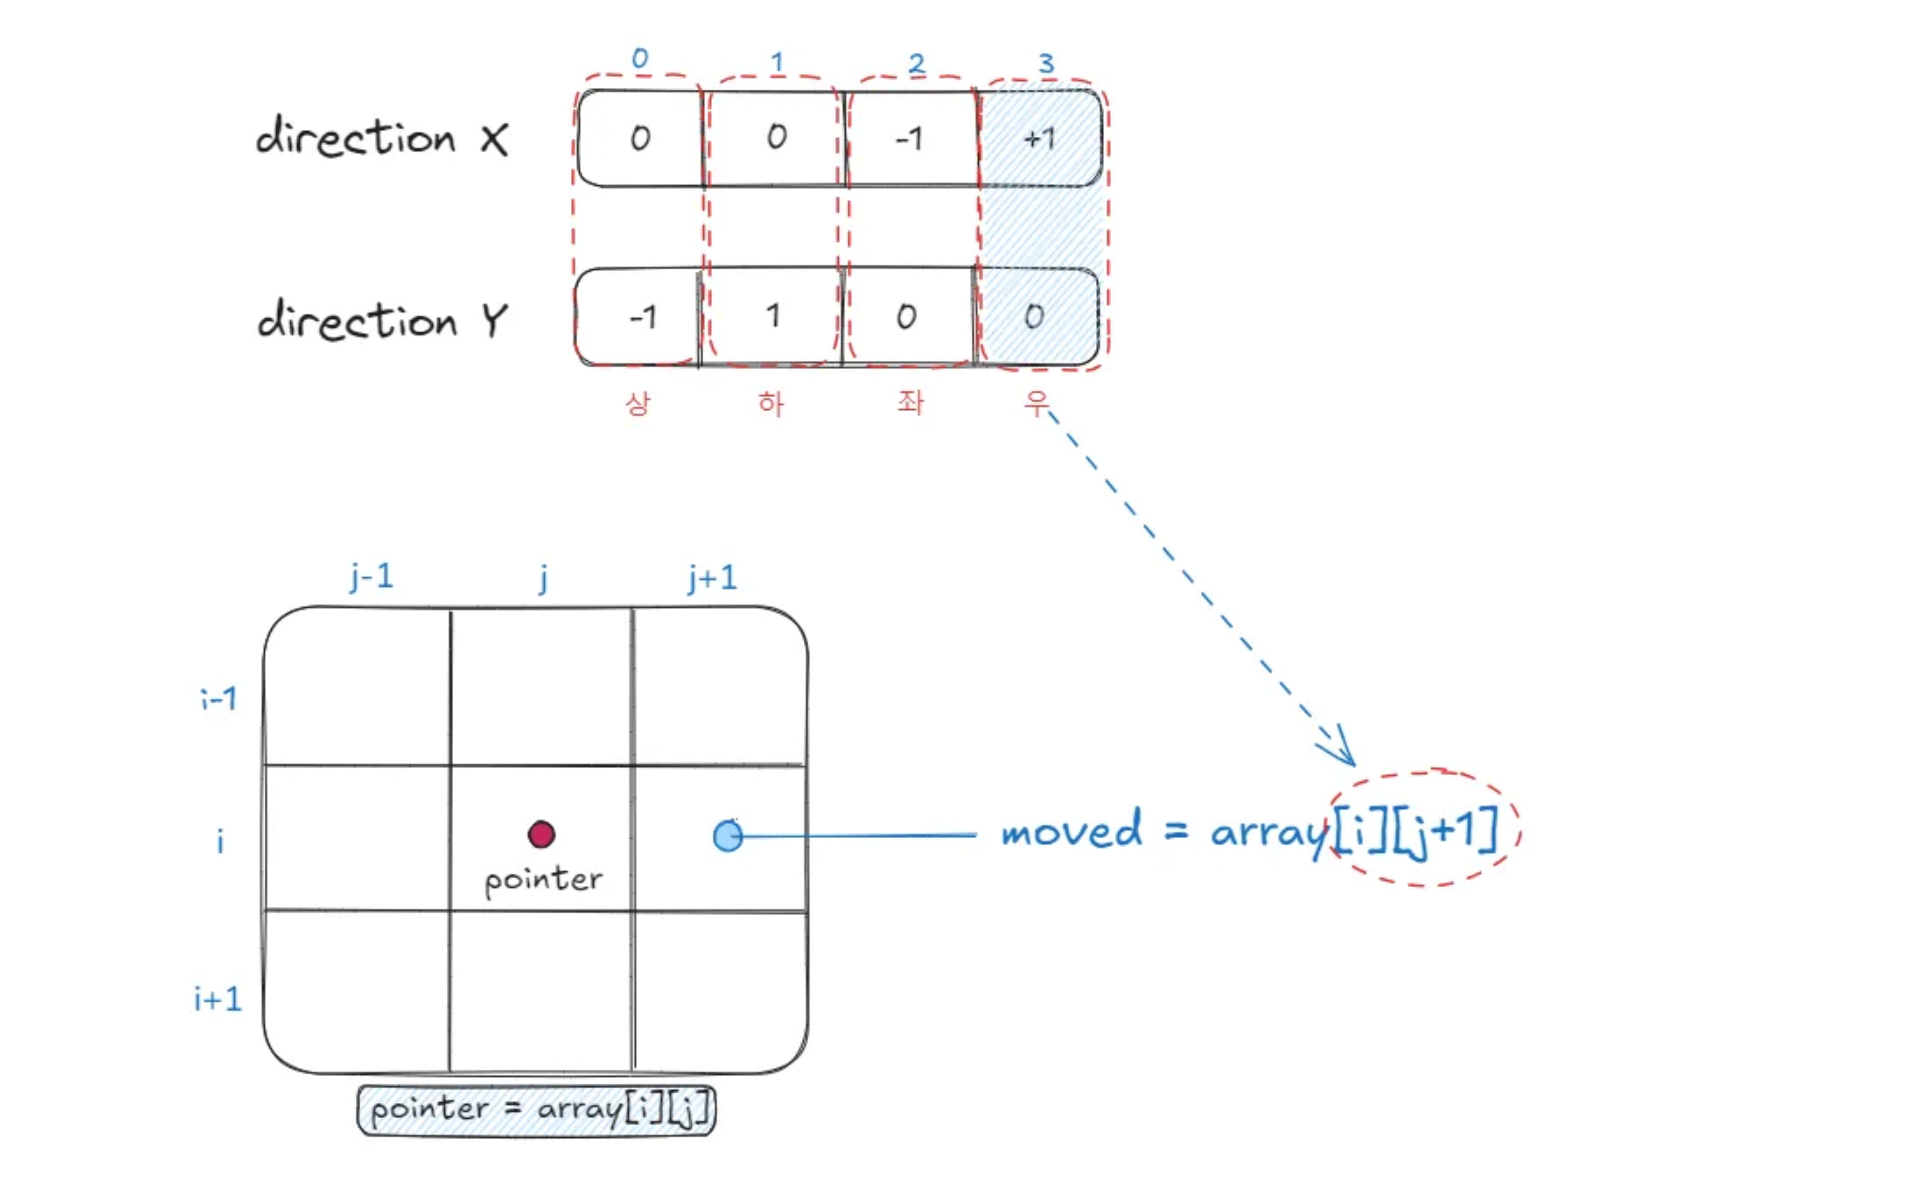
이 문제는 (0,0) 위치에서부터 4방향을 움직이되 움직인 위치의 값이 이전에 지나온 값이라면 갈 수 없습니다. 따라서 dxdy 테크닉을 통해 2차원 배열을 재귀로 움직이면서 현재 위치의 값을 visited 변수에 저장하고 이동하면서 참조한 뒤, visited 값이 true라면 재귀를 멈추면 됩니다.

1
2
3
4
5
6
7
8
9
10
11
12
13
14
15
16
17
18
19
20
21
22
23
24
25
26
27
28
29
30
31
32
const fs = require("fs");

const input = fs.readFileSync("dev/stdin").toString().trim().split("\n");
const arr = input.slice(1).map((el) => el.trim().split(""));

const dx = [0, 0, 1, -1];
const dy = [1, -1, 0, 0];
const visited = Array(26).fill(false);
let answer = 0;

const dfs = (depth, x, y) => {
answer = answer < depth ? depth : answer;

for (let i = 0; i < 4; i++) {
const nx = x + dx[i];
const ny = y + dy[i];

// 이동할 좌표가 없을 경우 continue
if (nx < 0 || nx >= arr[0].length || ny < 0 || ny >= arr.length) continue;
// 이동한 좌표의 알파벳의 아스키코드가 true면 이미 지나온 블록. continue
if (visited[arr[ny][nx].charCodeAt() - 65]) continue;

visited[arr[ny][nx].charCodeAt() - 65] = true;
dfs(depth + 1, nx, ny);
visited[arr[ny][nx].charCodeAt() - 65] = false;
}
};

visited[arr[0][0].charCodeAt() - 65] = true;
dfs(1, 0, 0);

console.log(answer);